Overview
Smiko is a vulnerability found by security research team HavenOverflow present in a Read-Only sector of
memory inside of the Google H1 Security Chip known as the BootROM. This vulnerability allows for
attacker-controlled payloads to be copied over the ROM's active execution stack at an extremely early
boot stage (before the AP firmware is loaded by the main CPU) and grants the highest possible level
of privileges on ARMv7 in the Cortex-M3 before any lockouts or privilege reductions occur, completely
exposing the typically signed boot process.
This vulnerability is completely unpatchable as the underlying issue itself is in memory that cannot be
modified by any means once the device has left factory. This effectively compromises several millions
of devices, as the entire security model is dependent on the idea that the H1's values (and the ones it controls) are trustworthy,
but with complete control of its processes and the ability to load unsigned code, all data from the chip
can now be tampered with, and its direct hardware access can be exploited.
Note: While the vulnerability is unpatchable and unmitigatable once injected, it is still possible to be
partially mitigated with a Cr50 firmware update, so avoid updating if you want to use this!
This includes (but is not limited to):
- The RMA (Return Merchandise Authorization) Server Unlock Code as well as private keys used in its generation
- All TPM2 data stored in the SRAM
- CCD (Closed Case Debugging) capabilities
- Various fuses and registers
- Access to USB controllers and UART channels for the EC, AP, and H1
- Control over battery cutoff and EC reset
- Flash controllers for the AP and EC
- Firmware Write-Protection for the AP and EC
- Private keys for pin-based userdata encryption
- Previously non-updatable data in the INFO1 field in the Flash (e.g. Board ID)
- Bitmaps and headers in the flash allowing for downgrading
In terms of compromised devices, every single Chromebook manufactured from 2019 to 2024 (excluding devices such as
the Nissa and Skyrim boards which contain an updated Dauntless chipset that does not contain the Smiko vulnerability
in its BootROM, and Pre-2019 boards such as Hana or Kefka which use an earlier version of Google's Security Chip known as Titan-C)
and Google Pixel Phones released from 2019 to early 2021 are suspected to contain this vulnerability.
For a more in depth explanation, consider reading The Blog.
Getting Started
There are several means by which Smiko can be injected, it's up to you to decide which one best suits your needs.
Here are the things you'll need:
- A USB drive with at least 8GB of storage (and that you're willing to erase)
- A seperate host computer to do the building (not needed if the target device is running Linux. RW_Legacy, Fullrom, Submarine, TerraOS, Shimboot, and JumpStart will all work)
- A target Chromebook (this guide will not cover hacking Pixels) with the H1 (Dauntless and NuvoTitan
chips are NOT supported) GSC
- The Chromebook Recovery Utility installed, or another USB flasher such as Rufus
- A basic understanding of Linux and Bash
- (Optional, but recommended) A GSC debug board, a Servo, or a SuzyQable for debugging and brick protection
Building
If you want to utilize the Smiko vulnerability, you'll have to manually build it. Prebuilts do exist, but
we recommend only obtaining them from trusted sources. Do not use a random sketchy payload you find on the internet,
there's a strong chance it'll hack you, brick you, or both.
First, you'll need to make sure you have the needed dependencies installed.
For Arch Linux and Arch-based linux distributions, e.g. Manjaro or EndeavourOS:
sudo pacman -S git make gcc protobuf tpm2-tss tpm2-tools
For Debian Linux and Debian-based linux distributions, e.g. Ubuntu, Mint, or Termux:
sudo apt-get install git make gcc g++ protobuf-compiler libtss2-dev libusb-1.0-0-dev pkg-config
For Alpine Linux and Alpine-based linux distributions, e.g. PostmarketOS:
sudo apk add git make gcc g++ protobuf-dev abseil-cpp protobuf pkgconf openssl-dev libusb-dev tpm2-tss-dev tpm2-tss-sys tpm2-tss-esys
For Fedora Linux and Fedora-based linux distributions, e.g. Submarine:
sudo dnf install git make gcc gcc-c++ protobuf-devel abseil-cpp tpm2-tss-devel tpm2-tools protobuf-compiler libusb1-devel pkgconfig
MacOS as well as OpenBSD/FreeBSD derivatives are not supported.
Next, clone the repo and start the build/install process:
git clone https://github.com/HavenOverflow/Smiko.git
You can exclude "STATIC=1" instead if you want to use dynamic linking and save space, but this is not recommended if you're planning on building shims.
cd Smiko
STATIC=1 make all
sudo make install
After running through the build process, the Smiko injector will automatically be installed on your system, and
all available custom firmwares will be be in /usr/share/smiko/firmware for you to inject.
If you want to inject a Recovery Image or a Shim with Smiko to serve as the installer (for devices that can't be
easily rooted), the repo has a built-in image patcher for you! To use this, you'll need to obtain an RMA Shim or a
Recovery Image. Recovery Images can be found at Chrome100, just find the board for your target device and
download a Recovery Image for it, preferably for Relesae R120 for the best results. RMA Shims cannot be provided due
to legal reasons, as their original host on dl.sh1mmer.me was taken down by Google. With that said, it
is still possible to find them with relative ease if you know where to look, all we'll say is Google Search is your friend.
(Pro Tip: Images that have already been patched with Sh1mmer can be used with the builder to inject an extra payload to work alongside
Sh1mmer instead of booting to just the Smiko installer!)
To inject an image, make sure it's fully decompressed from any zip/tar archives, then invoke the image patcher as follows:
sudo bash image_patcher.sh -i /path/to/target/image.bin
If the Recovery Image is on ChromeOS Release R125 or greater, you'll need to specify the argument --recomod to the patcher as well, and the image will only boot if developer mode is unblocked.
Writing to USB
This step is only necessary for those who are using an RMA Shim or a Recovery Image for Smiko injection. If you're running Smiko
using the SuzyQ method or the Local Installation Method (see the "Injecting" section below), you can skip this section entirely.
For users flashing on Linux-based operating systems:
You'll want to use dd to flash the image to a USB manually. This guide assumes you have a decent understanding of bash and
Linux. If you don't, then it's better you use Windows to flash a prebuilt.
First, plug in a USB drive that has at least 8GB that you won't mind erasing (this will completely wipe and reformat the drive,
so remember to back up anything important on it that you wish to keep).
Next, open a bash shell and run the following commands as root (replace X with the path to the USB device, and the smiko-image.bin path
with the full path to the RMA Shim/Recovery Image you wish to flash):
                    dd if=/path/to/smiko-image.bin of=/dev/sdX status=progress bs=8M

                    sync
If you get any errors such as "No space left on device", then the device you chose doesn't have 8GB to write the Smiko image.
For users flashing on Windows or any other OS:
First, you'll want to install the Chromebook Recovery Utility. Once you've got it installed, launch it by clicking its icon in
the extension submenu in the top-right corner of Chrome (the location may change if you're using a different browser like Brave or OperaGX)
Next, select the little gear icon in the rop right corner of the recovery utility, and select "Use local image", and upload the Smiko Installer image.

Plug in your USB drive, select it in the app, confirm, and the writing process will start. This can take anywhere from a minute to an hour
depending on the speed of your USB and your processor.
Injecting on Chromebook
The method to inject Smiko differs from device-to-device depending on what your capabilities are, once you've got everything
built (or obtained a trusted prebuilt). Hacking Google Pixel Phones with this vulnerability will not be covered by this guide.
RMA Shim/Recovery image method
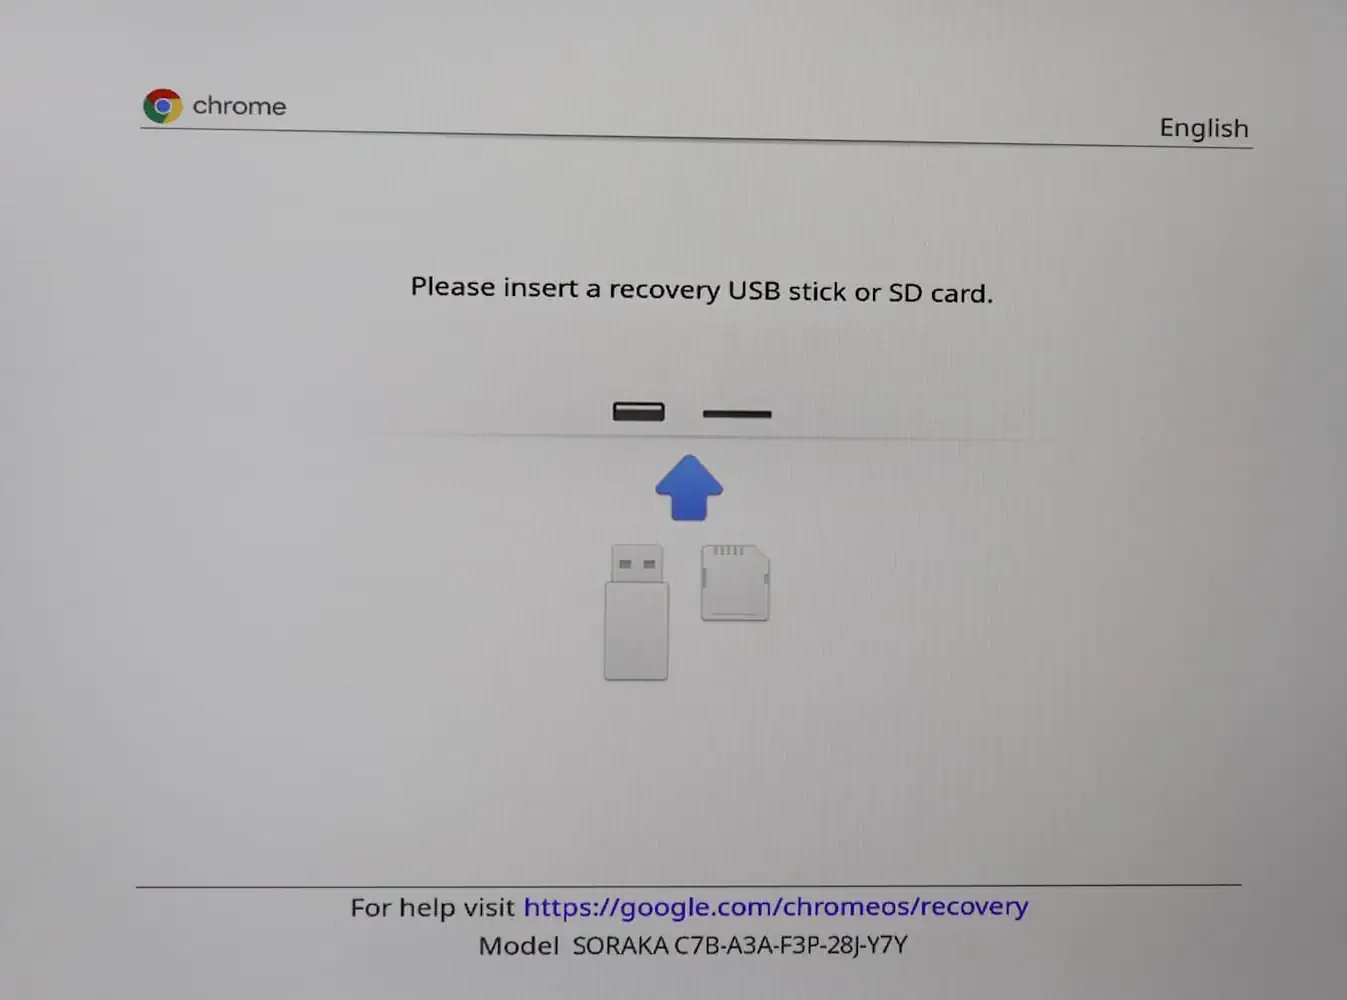
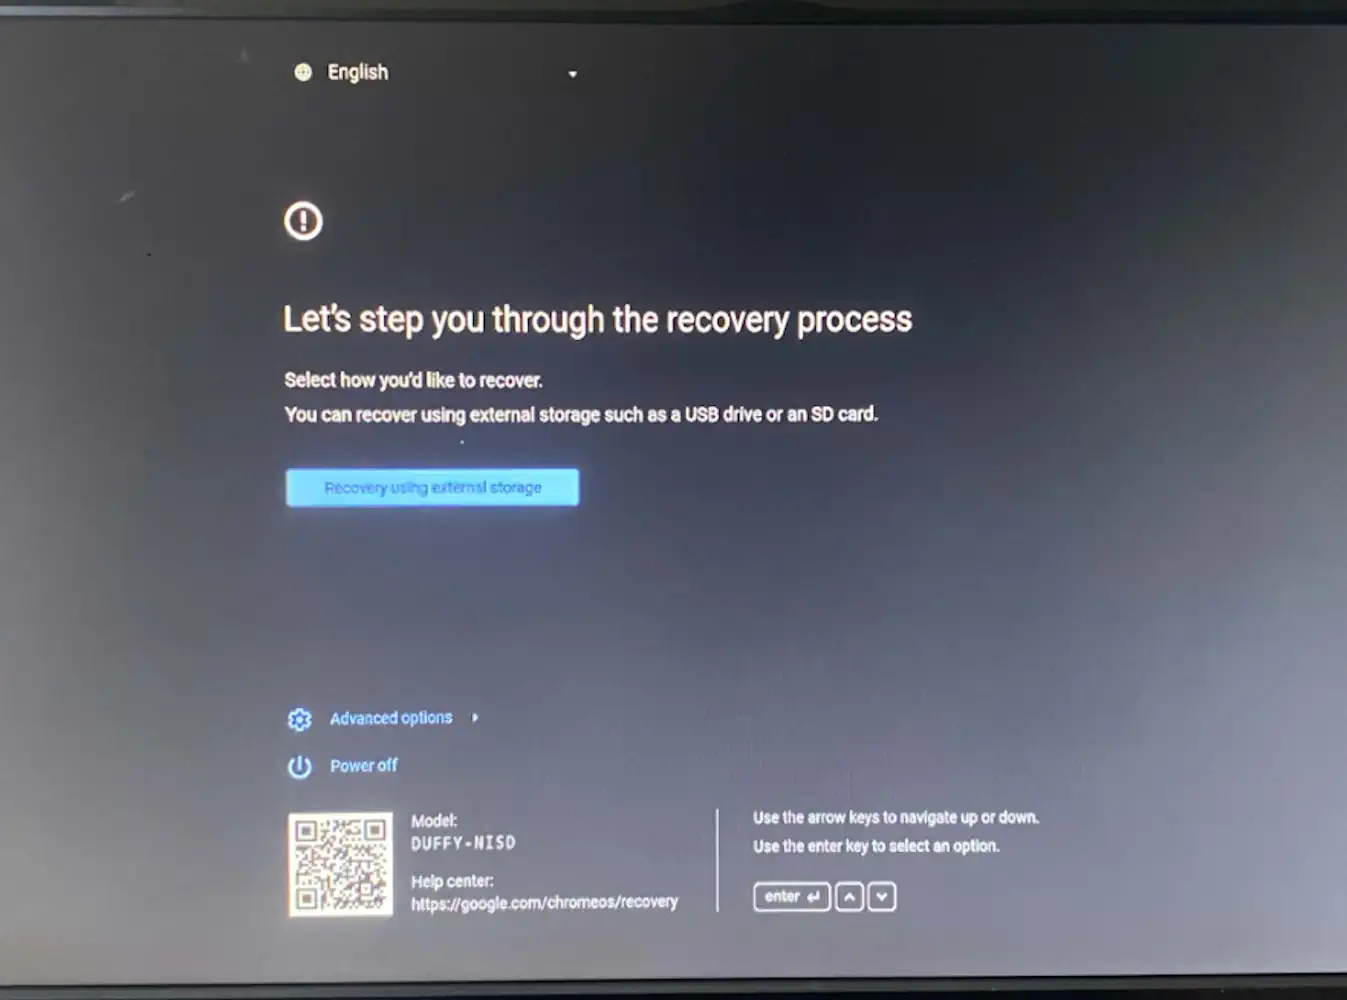
If you built an RMA Shim or Recovery Image for your board, place the target device in developer mode. To do this, press the
ESC key, the Refresh Key (↻ or F3), and the Power button (⏻) at the same time. The device will reboot into Recovery mode.
It should look like one of the screens below:


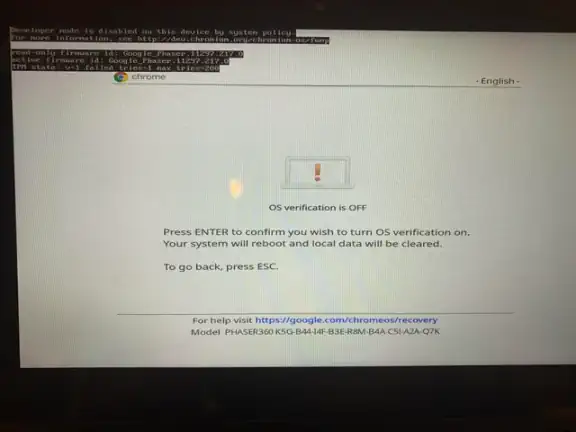
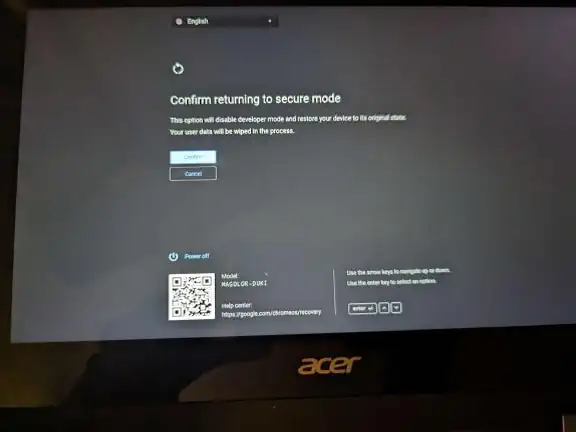
From here, press the CTRL key, and D at the same time, then press enter to confirm (note that once you confirm all data on
the device will be powerwashed, so make sure to back up anything important beforehand). Your screen should look like one of
the images below:


Once the target device is in Developer Mode, once again put it Recovery Mode, press the ESC key, the Refresh Key (↻ or F3),
and the Power button (⏻) at the same time. Now, plug in the USB you flashed with the Recovery Image/RMA Shim, and it should
load. The RMA Shim should quickly copy some files and tell you to unplug the USB, DO NOT UNPLUG IT! Just wait for the
Smiko installer to load. The Recovery Image will likely take a good bit to load, it'll say it's recovering ChromeOS, just keep
waiting for it to finish and then eventually the screen will be replaced with the Smiko installer.
Network Installation method
If you don't want to spend the hassle building everything and just want everything to be automatic, you can use the Smiko Network Installer
to install Smiko locally. To do this, run the following as root on the target device:
curl -k https://havenoverflow.github.io/Smiko/image_utils/netinst_gui.sh | bash
This can also be run from Sh1mmer's bash shell if you get a wifi connection!
Local Installation method
If you build Smiko on the target device using Linux (e.g. from TerraOS/Shimboot/JumpStart/Submarine/RW_Legacy/Fullrom), you can avoid Shims and Recovery Images and just manually install the built
files. To do this, from the root of the Smiko repo, run the following as root:
make install
This will install the Smiko injector to your RootFS and inject Smiko over TPM2. When you run --finalize your system will fully reset,
and Smiko Custom Firmware should be active.
smiko --write_rom build/loaders/smiko-loader.bin
smiko --write_firmware build/firmware/smiko-cfw.bin
sync && smiko --finalize
SuzyQable Installation method
If you have a host computer to handle the building and injecting, Smiko can be injected over a USB-C connection via a GSC debug board.
To get started, you'll need a host computer. SuzyQ injection is not recommended to be done from the target Chromebook as problems are
more common when doing so. On the host computer, compile and install the smiko command line utility if you haven't already. Connect the
SuzyQable (or GSC debug board) to the target device's left charging port (if you get device not found errors, try any other charging port(s),
if the target board is Octopus, plug in a charger into the right side of the chromebook and it'll work),
and run the following from the root of the Smiko repo as root:
smiko --write_rom build/loaders/smiko-loader.bin --suzyq
This will inject Smiko over the USB-C connection. When you run --finalize the target system will fully reset, and Smiko
Custom Firmware should be active.
smiko --write_firmware build/firmware/smiko-cfw.bin --suzyq
smiko --finalize --suzyq
Now What?
With custom firmware running on the H1, a lot of the restrictions that used to be in place are now relaxed. Among many
things, you can now unenroll with Sh1mmer again with 0 trouble, use KVS without fully unenrolling, disable WP without
disconnecting the battery, set the RSU code to a custom value, and many other things.
Recommended Steps
Once you install Smiko Custom Firmware, you should be good to go, but if your Chromebook is enterprise-enrolled, here
are some steps you can take to get it out of management easily and avoid patches:
- Use Sh1mmer as normal. Smiko CFW undoes all of the patches that stopped it from working, so unenrollment will work as normal.
- Use Kernel Version Switcher to reset your kernel version space to the factory defaults. This will prevent bricks and allow you to downgrade to any version of ChromeOS. You won't need to unenroll to do this once Smiko CFW is installed.
- Set your GBB flags to the value 0x82b0. To do this, disable firmware write-protection (you won't need to use the jumper or disconnect the battery to do this anymore) and
run sudo bash /usr/share/vboot/bin/set_gbb_flags.sh 0x82b0 from inside ChromeOS. This will force Developer Mode available even if FirmWare Management Parameters would typically disallow it.
- If you've bricked your device using the old "Br1ck" exploit, you can now use sudo gsctool -a -o to unbrick it with no issues one Smiko CFW is installed.
